
spinal rehab exercises for the lower back - Spine Plus
You have been provided with these exercises to help improve your Low Back Pain. ? These Exercises are intended to assist with strengthening around your
adsPart of the document
-
SPINAL REHAB EXERCISES FOR THE LOWER BACK
The following exercises form part of our 8 week lower back rehabilitation programme and have been designed
to compliment IDD, (medical) acupuncture, physiotherapy and/or osteopathy treatment at our clinics, they
may also form the basis of post operative rehab for patients who have received spinal surgery. The exercises
and descriptions that follow are for reference purposes only and on their own do not constitute a complete
treatment programme. Anyone viewing this page is advised NOT to perform these exercises without first
being assessed by one of our clinicians or a similar specialist. Correct technique is VERY IMPORTANT, we
therefore strongly recommend clients do not engage in these exercises without first undergoing one or more
one to one sessions with a member of our therapy team so that correct execution of each exercise can be
shown. Apart from a mild ache or burn from using certain muscles, none of the exercises should cause undue
pain, if pain or increased symptoms are experienced during or as a result of these exercises patients are
advised to refrain until consulting their therapist / specialist.
Guide: Week 1: Perform exercises 1 - 3. Aim for 2 - 3 sets twice daily.
Weeks 2 - 4: Perform exercises 1 - 9. Aim for 2 to 3 sets twice daily.
Weeks 3 - 4: Exercises 3 & 6 -15. Aim for 2 to 3 sets twice daily.
Weeks 5 - 6: Exercises 3, 7, 11, 12, & 14 for 2-3 sets twice daily AND 16-21, 2-3 sets on alternate days.
Weeks 6 - 8: Exercises 3, 7, 11, 12, & 14 for 2-3 sets twice daily AND 20, 22 - 25 for 2 -3 sets on alternate days.
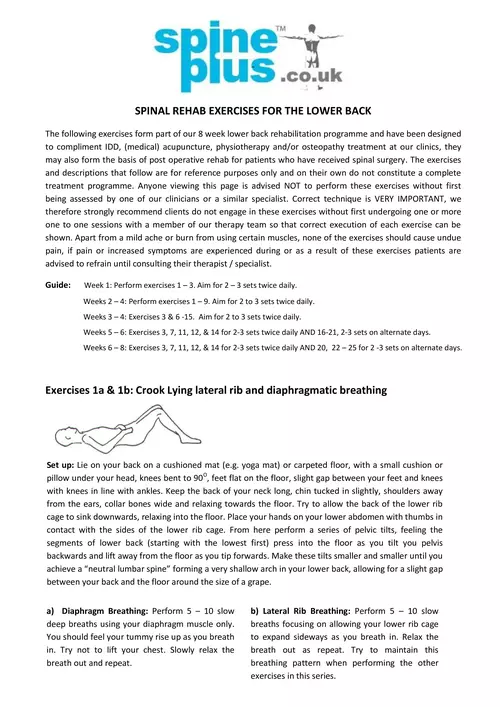
Exercises 1a & 1b: Crook Lying lateral rib and diaphragmatic breathing
Set up: Lie on your back on a cushioned mat (e.g. yoga mat) or carpeted floor, with a small cushion or
pillow under your head, knees bent to 90O, feet flat on the floor, slight gap between your feet and knees
with knees in line with ankles. Keep the back of your neck long, chin tucked in slightly, shoulders away
from the ears, collar bones wide and relaxing towards the floor. Try to allow the back of the lower rib
cage to sink downwards, relaxing into the floor. Place your hands on your lower abdomen with thumbs in
contact with the sides of the lower rib cage. From here perform a series of pelvic tilts, feeling the
segments of lower back (starting with the lowest first) press into the floor as you tilt you pelvis
backwards and lift away from the floor as you tip forwards. Make these tilts smaller and smaller until you
achieǀe a ͞neutral lumbar spine" forming a very shallow arch in your lower back, allowing for a slight gap
between your back and the floor around the size of a grape.
a) Diaphragm Breathing: Perform 5 - 10 slow
deep breaths using your diaphragm muscle only.
You should feel your tummy rise up as you breath
in. Try not to lift your chest. Slowly relax the
breath out and repeat.
b) Lateral Rib Breathing: Perform 5 - 10 slow
breaths focusing on allowing your lower rib cage
to expand sideways as you breath in. Relax the
breath out as repeat. Try to maintain this
breathing pattern when performing the other
exercises in this series.
Exercise 2: Crook Lying Transversus Abdominis (Trans Abs) recruitment
Transversus Abdominis (Trans Abs - for short) is the name of
a deep intra-abdominal muscle whose fibres run
circumferentially around the trunk and has attachments onto
the spine (via the thoraco-lumbar fascia). In Studies Trans Abs
has been shown to have a major stabilising role for the lower
back, studies also show this muscle becomes weak during
chronic back pain due to ͞reciprocal inhibition" whereby the neural signals to the muscle are switched off, it is
therefore very important to switch these neural pathways back on again via specific exercises. Using the same
set up as in exercise 1 place your finger tips just inside the two bony prominences at the front upper part of
your pelvis (Anterior Superior Iliac Spines, ASIS). Breath in as described in exercise 1b, midway through the out-
breath start to pull you lower tummy (below the belly button) inwards and uppers (without raising the chest
or loosing contact with the lower ribs imprinting into the floor). At the same time try to contract you pelvic
floor muscles. If you are using the correct muscles groups you should feel a slight contraction under your
finger tips. Initially make a strong contraction, hold this contraction for the count of one second then relax to
half way (50%) then relax half way again so you contracting with approximately 25% effort, we describe this as
͞SETTING THE CORE". Try to hold this 25й effort contraction for 10 seconds whilst you maintain the breathing
pattern as described in 1(b), this constitutes one repetition. Build up to 10 repetitions.
Exercise: 3: Glute Stretch
Exercise 4: Hip Twist (Level 1)
The Glute (buttock) muscles often become tight as a result of
low back problems and this can further unbalance the position of
the pelvis and lower back. Lie on your back as illustrated
opposite with your right leg crossed over the left so that your
right ankle rests just below your left knee. Keeping your ankle
where it is, slowly push your right knee away so that your right
leg rotates (externally). At the point of maximum (comfortable)
stretch, hold the position for 20 - 30 seconds.
Repeat for the other leg. For an alternative stretch slowly pull
your knee towards the opposite shoulder.
Variations: Rather than pushing the knee away pull it towards
the opposite shoulder for an alternative glute stretch. Start by lying on your back with a slight gap between bent knees
as in the set up for exercise 1. Set your core to 25% as described
in exercise 2. On an out-breath slowly float your right knee out
the side to a 45o angle, breath in and return your leg to the
starting position. Try to make sure your other leg stays perfectly
still as your move your right leg, imagine a glass of Champagne
balancing on top of knee! Also, as you move your leg to the side
try to make sure your pelvis stays perfectly still, imagine a try of
drinks balancing across your pelvis. Return you leg to the start
position as you breath in.
Perform 10 repetitions for the right leg then 10 for the left leg or
alternate legs until reaching 10 reps per leg.
Copyright Spine Plus
Exercise 5: One Leg Stretch (Level 1)
Exercise 6: Knee Hugs (Lower Back Stretch) Exercise 7: Pec Stretch
Exercise 8: Hip Hike (QL Stretch)
Tight chest (Pec)
muscles causing
rounded shoulders can
have a significant
adverse affect on neck
and back posture.
Stand in a door way with your forearm resting
on the vertical part of the door frame as shown
in the drawing above. Keep your chin tucked in
slightly and back of the neck long, slowly lunge
forward so that a stretch is felt in the chest area,
hold for 20 seconds, slowly relax and repeat on
the other side.
Start by lying on your back, knees bent up with a slight gap
between them as in the set up for exercise 1. Set your core to 25%
as described in exercise 2. On an out-breath slowly straighten one
leg, keeping you heel in contact with the floor. Be careful that the
slight arch in your lower back (the size of a grape) does not
increase as you straighten the leg. Breath in as you return your leg
to the bent position. Perform 10 repetitions on each leg.
Whilst lying on you back grip BEHIND the back of
both knees. Keeping your knees bent to 90o slowly
hug your knees towards your chest, as you breath
out, so that your bottom lifts up from the floor
slightly and you feel a comfortable stretch in your
lower back. Hold for 10 seconds or perform gentle
rocking action.
Quadratus Lumborum (QL) is the name of a
muscle running from the lower rib cage to top
of the hip bone (ilium). Tension in either QL
muscle can affect posture and range of
movement in the lower back. Also ͞trigger
points" (or knots) in either QL can refer pain to
the lower back and buttocks.
To stretch your QL muscle and help correctly
align your pelvis lie on your back, legs flat with
feet pulled up at 90o to your shins, hands on hip
bones as shown. Whilst trying to keep a neutral
lower back (slight arch), hitch your hip up on
one side whilst stretching the other side away
so that your ankle slides past the other ankle,
repeat on the other side. Perform 10 slow hip
hikes for each side (20 in total). For a variation
perform the exercise with arms stretched
overhead.
Copyright Spine Plus
Exercise 9: Four Point Kneeling Trans Abs
Exercise 10: Swimming
Exercise 11: Cat and Dog Stretch
Kneel on all fours as shown, with a rolled up towel
near your ankles if needed for comfort. Set your
spine into a neutral position, keep your neck long
and eyes looking to the floor. Breath in as described
in exercise 1b, midway through the out-breath start
to pull you lower tummy (below the belly button)
inwards and uppers, at the same time try to contract
you pelvic floor muscles. Hold for 10 seconds on a
25% effort contraction whilst continuing to breath.
Repeat 5-10 times.
To start strengthening the spinal muscles lie on your front, arms out stretched, keep looking down, neck long, lift
the breast bone off the floor very slightly. If necessary tilt your pelvis backwards slightly in order to maintain a
neutral lumbar spine (without over arching). Set your core by engaging your Trans Abs muscles to 25% effort. As
you breath out slowly raise one arm and the OPPOSITE leg off the floor by a few inches, hold for 1 or 2 seconds,
lower and repeat for the other leg / arm. Perform 10 - 20 repetitions for each arm / leg.
Kneeling on all fours, slowly arch the spine upwards making
a C shape as you simultaneous tuck your tail bone in
(posteriorly rotating your pelvis) and drop your head
forwards. Try to feel each segment of your spine moving.
Hold this position for 5 - 10 seconds. Then slowly arch the
spine and pelvis the other way as you lift your head up, stop
when your lower back is just past the neutral position i.e. a
slightly accentuated arch in the lower back, without over
arching.
Copyright Spine Plus
Exercise 12: Double Leg Stretch (Level 1)
Exercise 13: The Clam
Exercise 14: Thoracic Twist
Start by lying on your back, knees bent with a slight gap,
arms pointing straight up. Set your core to 25% as previously
described in exercise 2. On an out-breath slowly straighten
one leg, keeping you heel in contact with the floor, at the
same time raise both arms over head. Be careful that the
slight arch in your lower back (just enough space for a grape)
does not increase as you straighten the leg and that your
chest does not lift as your raise the arms (try to keep the low
ribs imprinted into the floor). Breath in as you return your
leg and arms to the start position. Perform 10 repetitions
then another 10 for the other leg.
The Clam is a classic exercise to tone the buttock muscles
but performed correctly the core trunk muscles work hard to
provide sideways, rotatory and anterior-posterior stability.
To start, lie on your side, either on one arm or on a couple
of pillows. Create a slight arch in your lower back and tilt
your pelvis sideways away from your head in order to create
a small gap between your waist and the floor, make sure
your top hip is directly over your bottom hip, maintain this
neutral spine position throughout. Your top hand may
contact the floor but only using a light finger tip touch for
stability.
Set the core (Trans Abs), then with knees bent slowly raise the top knee upwards whilst keeping ankles
together. Hold for half a second at the top, slowly lower the leg and repeat. Perform 10 repetitions on each leg.
To make the exercise more challenging, perform the exercise with a (partially) straightened lower leg.
The joints of the middle and upper back (thorax) are designed for rotation more so than the lower back, this
exercise encourages controlled thoracic rotation whilst keep a stable core and lower back. Lie on your side with
your head on one or two pillows, knees bent, neutral lumbar spine (slight arch and gap between the side of the
waist and the floor). Set the core (Trans Abs to 25% effort). Keep the top hip directly over the bottom hip. As
you breath out float the top arm upwards using a twisting action of your middle and upper back to create the
majority of the movement, one segment at a time, rather than simply stretching the chest muscles. Try to
avoid any movement through your lower back, think of moving from above the waist only. Breath in as you
return to the start position. Repeat for 10 repetitions then lay on the other side and repeat in the opposite
direction.
Copyright Spine Plus
Exercise 15: Side Kick
Exercise 16: Four Point Leg Raise
Exercises 17: Three Quarter Standing Trans Abs
Lie on your side with your head on one or two pillows, knees
bent, neutral lumbar spine (slight arch and gap between the
side of your waist and the floor). Set the core (Trans Abs to
25% effort). Allow your top hand to lightly rest on the floor
but do not lean onto your hand. Keep your top hip directly
over the bottom hip. With your top leg almost straight
perform 5 repetitions raising the leg straight upwards, then 5
repetitions slowly kicking your leg forwards whilst
maintaining a neutral lumbar area. Roll onto the other side
and repeat for the other leg.
Kneel on all fours as shown. Set your spine into a neutral
position, keep your neck long and eyes looking to the floor.
Set your core by pulling your tummy in to 25% effort.
Slowly raise one leg at a time behind you ensuring not to
twist your lower back / pelvis as you do so. Imagine
balancing a tray of drinks on your lower back. For a more
advanced version, raise the opposite arm at the same time
as raising the leg. Repeat 10 times for each leg.
Lean against a wall so that the back of your head, shoulder
blades, and bottom make contact with the wall whilst
keeping the back of the neck long. Trying to maintain a
slight arch (just enough space for an imaginary grape).
Place your finger tips just inside the two bony prominences
at the front upper part of your pelvis (Anterior Superior
Iliac Spines, ASIS). Breath using your diaphragm and lower
ribs, midway through the out-breath start to pull your
lower tummy (below the belly button) inwards and uppers
(without raising the chest or loosing contact with the lower
ribs imprinting into the wall). At the same time try to
contract you pelvic floor muscles. If you are using the
correct muscles groups you should feel a slight contraction
under your finger tips.
Initially make a strong contraction, hold this contraction for the count or one second then relax to half way
(50%) then relax half way again so you are contracting with approximately 25% effort. Try to hold this 25%
effort contraction for 10 seconds whilst you maintain the breathing pattern as described in 1(b), this
constitutes one repetition. Build up to 10 repetitions. This exercise is essentially the same as no.2 but
performed in a more functional position in preparation for sitting and lifting exercises to follow.
Copyright Spine Plus
Exercise 18: Sitting Multifidus Swelling Exercise 19: Sitting Leg Lift
Exercise 20: Back Bridge Exercise 21: Back Bridge -
- With Resisted Pelvic Twist
Sit on a stool or back to front on a dining chair.
Place your thumbs into the gutter of muscle just
either side of the bony prominences of your spine
(spinous processes). Whilst maintaining a neutral
spine and keeping everything still try to perform a
static (͞isometric") contraction of your
͞Multifidus" muscles (the small intersegmental
muscles of the spine), try to hold the contraction
for 5 seconds then relax and repeat five times
(harder than it sounds!). Move your thumbs up
and down and repeat for different levels of your
lower back, paying particular attention to the
segment(s) where your problem is, e.g. L5/S1
This exercise works the Psoas Muscle, a sling of
muscle attaching from the font of the spine to the
top of the hip. Sitting on the edge of a chair (or on
a Swiss ball), start with both tip toes resting on the
ground. Engage your core muscles (Trans Abs),
keep a neutral spine, good shoulder, head and
neck posture then lean back slightly as illustrated
above. Breath in to prepare then exhale as you
slowly lift one leg off the ground, pause
momentarily at the top then lower the leg to toe
touch the floor again as you exhale. Repeat 10
times for each leg.
Start by lying on your back with knee bent up and
setting a neutral spine as described in exercise 1.
Set your core (Trans Abs) as described in exercise
2. As you breath out slowly push through your
heels raising your bottom off the floor but keeping
a neutral lower back. Pause for a second or two at
the top so you feel the buttock muscles (Gluteus
Maximus) contracting, then exhale as you slowly
lower. Aim for 5 - 10 repetitions with good
technique. Follow with two knee hugs stretches
(exercise 6).
Place one hand on the side of your pelvis at the
front and one hand on the other side at the back.
Perform a back bridge as described in exercise 20
whilst at the same time using your hands to
produce a twisting force of your pelvis, however,
use your core muscles to resist this twisting force
maintaining a neutral lumbar spine.
Repeat for 5 - 10 repetitions followed by with two
knee hugs stretches (exercise 6).
Copyright Spine Plus
Exercise 22: One Leg Back Bridge
Exercise 23: Side Bridge
Exercise 24: Scissors
Starting with knees bent up, a neutral lumbar spine
and a set core (Trans Abs). Place your finger tips on the
front of your pelvis. Perform a partial back bridge with
both feet on the floor. Then at the top of the
movement slowly straighten one leg making sure your
pelvis does not twist or drop to one side. Aim for 5
repetitions with each leg. Follow with knee hugs
(exercise 6).
Lie on your side, leaning on one elbow, knees bent,
neutral lumbar spine, Trans Abs engaged. Make sure
your shoulder nearest the floor is not shrugged
towards your ear. Inhale to prepare then exhale as you
lift your hips up away from the floor, pause
momentarily then lower the hip so it just touches the
floor (without resting) and repeat. Aim for 5 - 10
repetitions. To make the exercise more challenging
perform with straightened legs.
Start by lying on your back with both feet on the floor. Set your spine in neutral as described in exercise 1
and engage your Trans Abs. Bring one leg up at a time so both legs are as shown in the first drawing above,
this is the starting position. Whilst keeping a neutral lower back (slight arch, just enough space for a grape)
slower lower one leg at a time, alternating legs in order to lightly touch the floor with your toes. Aim for 10
repetitions for each leg.
Copyright Spine Plus
Exercise 25: Deadlift
To avoid excessive strain
on the knee try not let
knees go in front of feet.
Feet turned out
slightly
Try to maintain a
shallow arch in your
low back, with your
tummy pulled in
slightly.
Exhale
Correct lifting technique is very important, even for light objects as it is such an every day task, repeated
lifting with poor technique can subject the discs in the back to accumulative strain. Practice using an empty
cardboard box, start by standing close to the box, feet turned out slightly. Keeping a neutral lower back
(slight arch) and engaged Trans Abs (tummy pulled in) squat down trying to keep your heels on the ground
without allowing your knees to go forward past your feet. Grip the box on either side, then start the lift by
driving your hips upwards and forward whilst keeping a neutral lumbar spine, try to push through the heels
rather than toes, exhaling as you lift. Repeat 5 - 10 times. As and when you feel confident and when directed
by your therapist / specialist you may start to add weight to the object you are lifting BUT this should not be
done before 3 months after the commencement of treatment or at least 3 months after surgery on your
back.
Do͛s and Don͛ts
Whilst undergoing treatment and performing
rehab exercises it is very important not to undo all
that good work by adopting postures and bad
habits that place undue stress and strain on the
ligaments and discs of the spine.
The discs of the spine have a limited nerve supply
(in some people more than others) which is why,
unlike for other parts of the body, pain may not
immediately be felt when the discs are placed
under strain. This is perhaps one major reason why
back problems is so common.
Remember not to slouch or slump whilst sitting on
the sofa, driving, at the office and doing
housework etc. Use correct lifting techniques and
consider whether your bed / mattress needs
changing.
We wish you well on your recovery from back
pain, we are there to help!
- The Spine Plus team.
Copyright Spine Plus
Bottom moving
backwards and
downwards as if
squatting into a
chair
